

Here we are with non fried dahi baray made with mash ke dal or whilte lentil. If only I could tell how long I have been trying to share this special recipe! It takes a while to get proportions of the ingredients right, prepping for photography and much later comes writing and sharing on social media. I made these so many times but it seems like these dahi baray are camera shy or something because it took forever to get them pose for the photo shot. In simple and honest words, I couldn’t resist serving them at the food table and kept on delaying taking photos. Finally they are ready to take the spot light.

Earlier there is a recipe of Gluten Free Dahi Baray- 2 Variations shared on the blog. Those are made with baisin/chickpea flour. Traditionally, dahi baray, or should I say Baray, are made with white lentil or mash ke dal as we call it in Urdu. Later people started using half of whitle lentil (mash ke dal) and half of yellow lentil (mong ke dal) to make baray which is quite common in regular household. Some even make baray with yellow lenti (mong ke dal) too. It is just a matter of personal preference and availability of the ingredients. Commercially, as in the market, lentil baray are extremely rare and mostly made with baisin (chickpea flour) and maida as it is most cost effective.

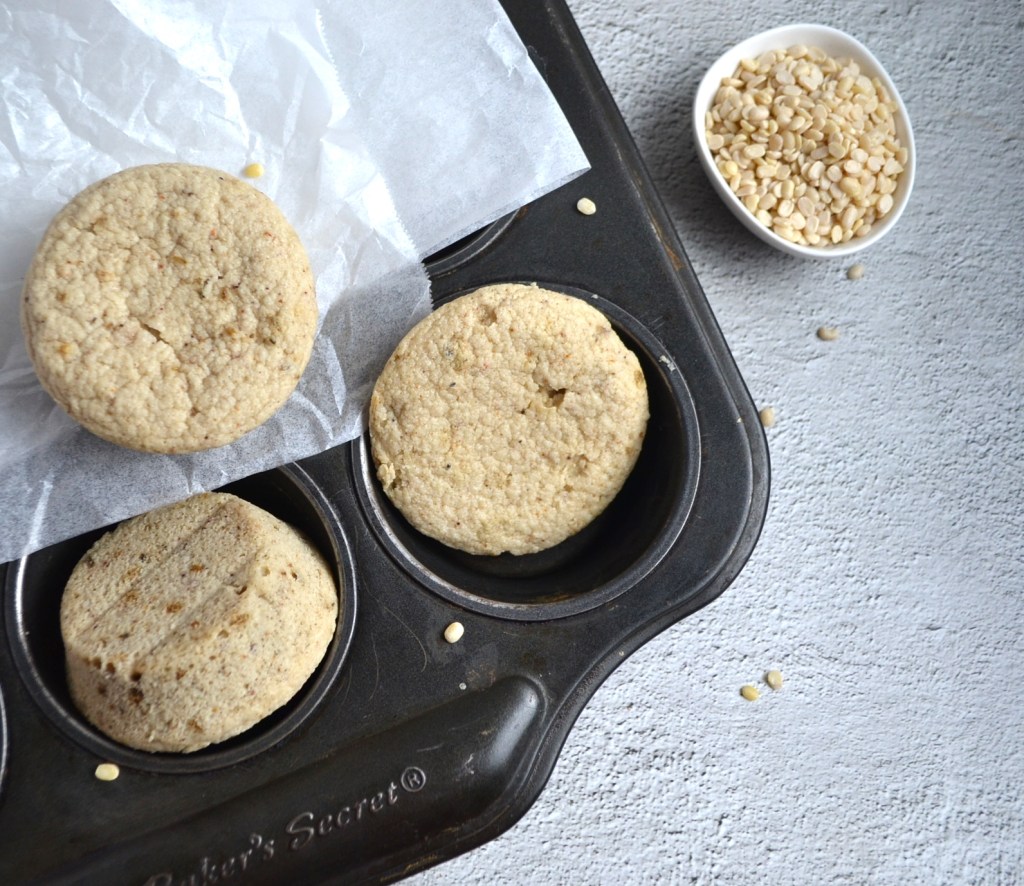
What makes this recipe share worthy is the fact that it is completely gluten free, made with mash ke dal (white lentil) and a healthier version as it is baked/steamed rather than being deep fried. There is absolutely no difference in taste and texture of these steamed baray. They hold their shape well even when soaked in water and dipped in yogurt. Like all sorts of baray, they do get ultra soft when they are in yogurt mix for extensive duration of time. I do not freeze them. I store them in airtight bag/container in refrigerator and use within 3 weeks. One thing I would really recommend is to soak them in hot water with some salt and sugar to enhance the taste. Squeeze between palms or press with fingers to squeeze out extra water before adding them to yogurt to assemble.
Method is simple and exactly like you make fried baray. Soak dal/lentil over night or for 8 hours. Drain the water and blend dal with few other ingredients in a blender to form thick batter. Grease cupcake pan holes and fill about up to three quarters or a half according to the required thickness of baray. Put a baking tray in the oven and pour some hot water. Place this cupcake tray filled with baray batter and bake for about 20 minutes. This water bath will keep baray moist even there might be some cracks on the surface once baked and cooled but it is due to the baking process. I do not over season baray with unnecessary ingredients and keep them simple. This gives an option to season yogurt as you like… sweet, spicy or something in between.

BAKED/STEAMED DAHI BARAY
Make traditional baray without deep frying! It is a healthier version without compromising the taste and texture.
Course Appetizer, Side Dish, Snack
Cuisine Pakistani
Keyword baked dahi baray, Gluten free, gluten free dahi baray, healthy dahi baray, mash ke dal kay baray, steamed dahi baray
Prep Time 20 minutes
Cook Time 20 minutes
Servings 12 baray
Author Heenie
INGREDIENTS
- 2 cups mash ke dal/white lentil. Soak it overnight or for 8 hours
- ¾ tsp salt
- 1 tsp white cumin seeds
- ½ tsp garam masala powder
- ½ tsp thyme/ajwain (optional)
- water as required
- 1 tsp baking soda
INSTRUCTIONS
- Preheat oven at 190 C/375 F.
- Grease a 12 hole cupcake pan with cooking oil.
- Place a baking tray inside the oven. Fill about ¼ or ⅓ of the tray with hot water.
- Drain water from soaked dal/lentil. It is ok to have some water left.
- Put dal/lentil in a blender jug.
- Add in salt, cumin seeds, garam masala powder and thyme/ajwain if using.
- Run the machine to blend everything well.
- Depending on how powerful the blender is, you might need to add some water to get a smooth and thick batter.
- Blend for about 3-4 minutes, checking in between to see if dal/lentil has been blended well or not. It depends on the blender power.
- Add in baking soda and mix well in the batter.
- Pour batter equally in to greased cupcake holes or according to the required thickness and size.
- Carefully pace this cupcake pan over the baking tray with water.
- Bake for about 18-20 minutes.
- Remove once baked from the oven.
- Let cool in the pan for about five minutes and then take them out of the pan and palce on a wire rack to cool completely.
- Can be stored in a refrigerator for up to 3 weeks in an airtight conatiner.

Leave a comment